Wednesday 27 November 2013

Peer assessment.

On Monday 25th of November Hayley completed her assessment which consisted of her doing my makeup and hair design on me. Using only my information pack to create my look, as well as practice and watching me create the look.

Whilst analysing Hayley like asked I took note of how Hayley handled the assessment. Hayley practiced my makeup design three times.
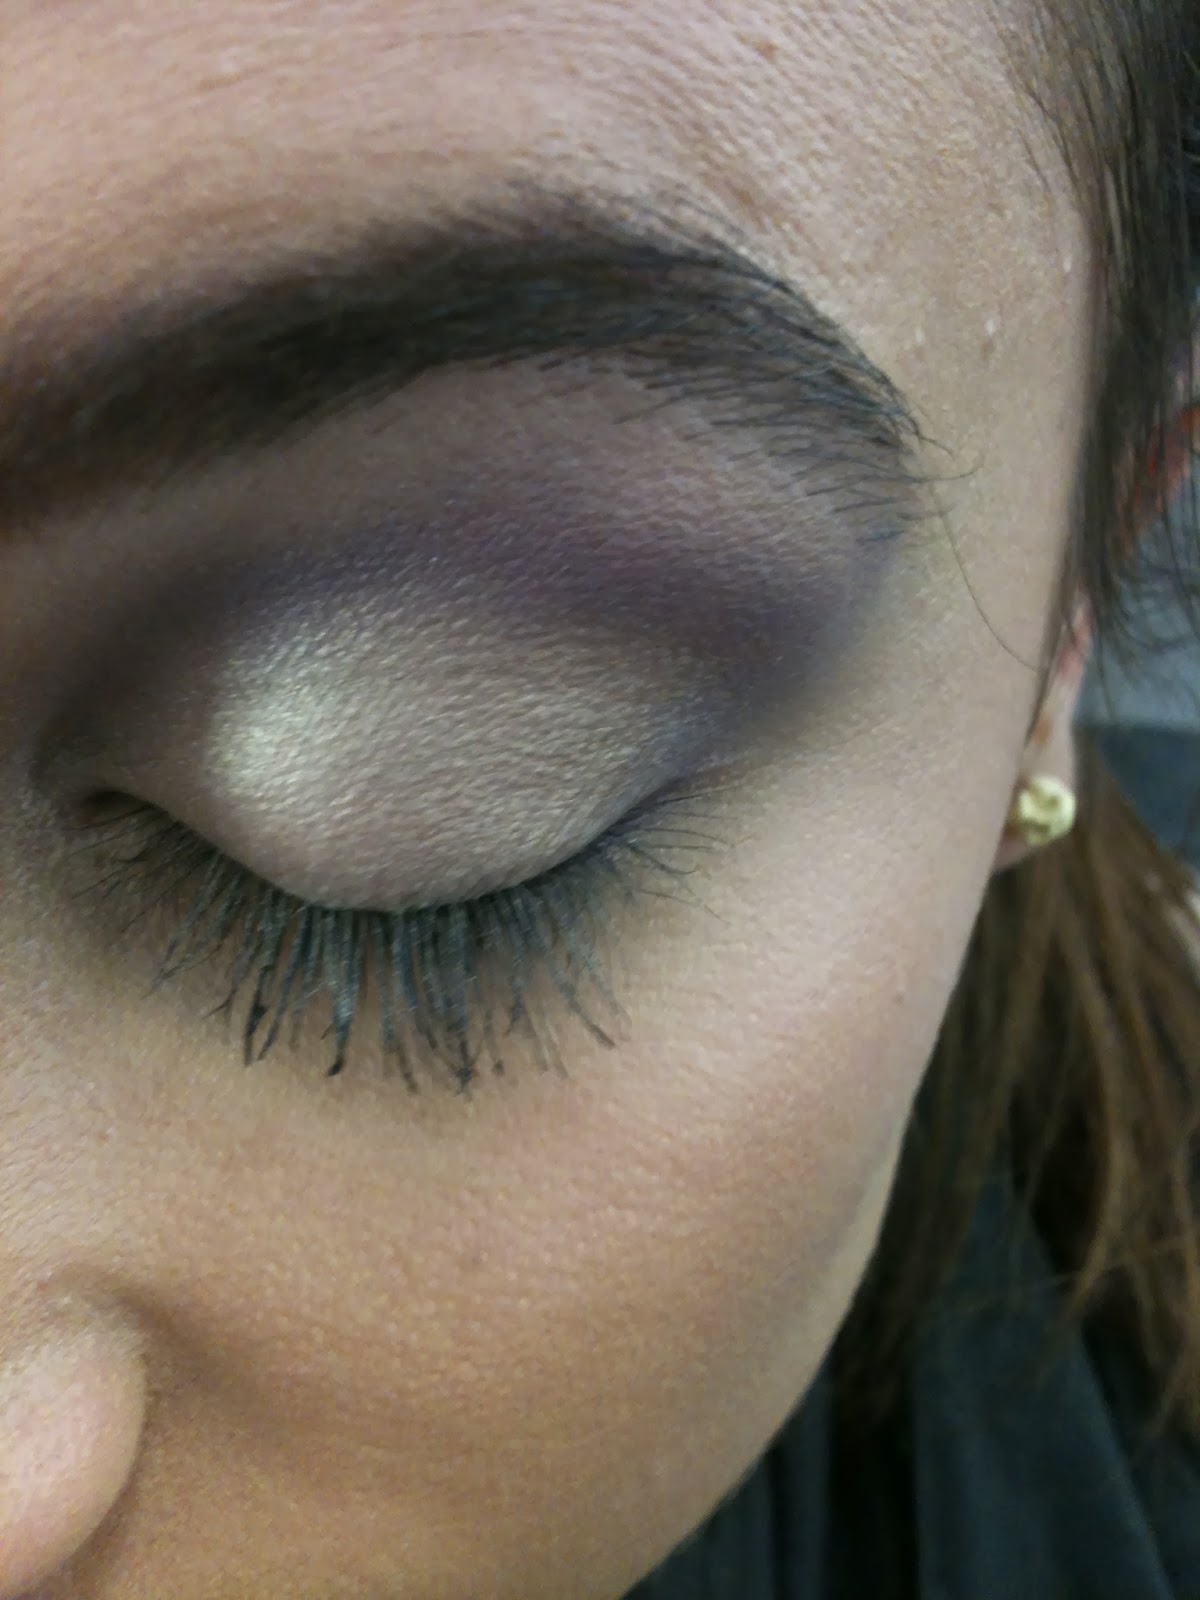
Hayley applied an even,seamless skin base all over. Hayley followed my instructions well and paid attention to the techniques I wanted the makeup to be applied i.e I wanted the foundation buffed into the skin with a buffing brush not with a sponge or brush.She created the look intended. Hayley was very hygienic using hand gel constantly and clean mascara wands. She looked professional and I had confidence that she would create my design well. However she did not have enough time to apply my bottom set of eyelashes which I was a bit disappointed about.  However I felt that Hayley used the time effectively as the makeup did need more attention than the hair. However I was pleased with the out come.
If I was do my design I would've spent less time blending the foundation as I felt it was blended well enough and applied the bottom lashes as these looked really effective. I have learnt from Hayleys assessment that I will start on the hair design first as I would like the makeup to look as fresh as possible and to ensure I have time for the finishing touches that really make the design. My makeup still looked fresh but started to crease slightly in areas. But Hayley executed the design well and I was pleased with how well she created my design.


My information pack.

For my look I put together a pack that included all of the details of each section of makeup so my partner did not forget a single detail. 


Sunday 24 November 2013

My Final design.

I wanted to create an update of my design. After designing my face chart and practicing my design on myself I wanted to blog my development of my design.

 I have decided to make the eyebrows even whiter by applying MAC's eyebrow pencil over them first then applying the white foundation. I also want the eyebrows to be elongated using MAC's white eyeliner to exaggerate the bleached out brows. I also want the brows to be fluffed up with a brow brush to add texture.

 I am going to create some white eyelashes for the top lashes and the bottom I will paint them white to really exaggerate having white eyes. This also helps keep the face pretty neutral.
I feel the lashes will look a lot more powerful and and clean as the white on the eyelashes tends to transfer onto the skin creating white blotches and goes in the creases under my eyes which is not good! This will also help our time management.

I have decided after practice to have the Henna stencil ending at the shoulders seeing Botticelli's Primavera painting of the goddess named Flora has inspired me to bring the design below the neck to represent the ruffle. As her flowers begin at the neck. I have also decided that I did not like the henna pattern being all over the neck and have agreed with my partner that the Henna should go from the top of the to the shoulder just on the left and right side and down the middle of the neck. However the pattern going down the middle will only go in between the collar bones. We will make sure this looks as precise as possible  by drawing a guideline in white eyeliner.

Creating my partners design.

Creating my partners design.

 First I applied the base. Hayley wants her design to have a sort of mask effect. Alabaster skin around the eyes like a masquerade eye mask. The rest of the skin her skin colour to  exaggerate and show contrast between modern ideal beauty and 15th century ideal beauty.
 For this I used Kryolan stacked foundation  in my skin shade. Illamasqua's white foundation base for around the eyes. To me this does not make too much of a contrast it just looks like I am highlighting my eye area as I am extremely pale. However Hayleys skin is much warmer so will look ideal on her face and will demonstrate her concept well. Hayley does not want a heavy mask effect she would like it blended well so it does not look to sharp.I used a buffing brush to blend the product into the skin using the lightest shade first,then my skin colour, then went over the palest shade and blended.
 Here the blusher has two purposes to contour the cheekbones and to add a pinch of colour. I used Illamasqua powder blusher in shade Tremble.
 This idea again demonstrates the rosy cheeks the Elizabethans would wear, yet a contemporary twist on exaggerating the bone structure. Hayleys wants the blusher to be subtle yet strong so blended well as the main focus will be on the eyes, and lips.


 I then lightly filled in my brows. Then using aqua colour I attempted to draw on Hayley's eyebrow pattern which I believe she may be stenciling or creating out of ribbon. I am no artist and think this looks as if a child has painted it. I think if I practised with the right brushes this is an achievable look. I then applied a dark subtle wash of green on my eye lid up to the crease. I then applied a lighter green on my lower lash line using a flat brush. I then applied a light coat of black mascara.


If this look is applied well I think it could be a really pretty look once it is all pieced together as the look is very soft. Then the brow is strong so I think it is a nice contrast.


Hayley had a red subtle ombre lip on her design. I created the lips using MACS lips mix in red and black. I applied MAC's red lip liner all over the lips to stop the lips from bleeding and it set a really nice base and outline. I then apply just the red lip mix to the middle as when experimenting with Hayley before I mixed the red with the white and it went a pink shade of red and she decided she wanted more of a blood red. I applied the red to the cross bow of the lips and at the center of the bottom lip. I then applied the mixed black and red colour (plum red) to the corners of the mouth into the center rubbed my lips together to get the ombre effect. I then used my eye blending brush to blend the colours out nicely and to clean up the lips a bit and this was the outcome. I love these lips they are even very much  on trend for this season.


Reflection.

I really like Hayley's design, and I enjoyed re-creating it. As it is one of these looks to me that when you start applying the products to the face I was a bit wary about whether it would look okay. But once the whole look is pieced together the look, looks complete (apart from the brows they need work). The timing was really good it took me a total of 40 minutes to complete the look.

I feel that Hayley’s look communicates an Elizabethan feel to it. The skin being a contrast of pale to a warm colour on her skin. The rosy cheeks that have two purposes both modern and could be referenced back to that era. The red lips with a modern twist, the eyebrows incorporating paper self and Elizabethan swirls. Hayley has also used elements from our practical sessions such as complimentary colour the green eyes, against the red lips and eyebrows, and monochromatic colour with ombre lips. Her look shows a mixture of classical Elizabethan makeup with a contemporary twist.

I find this look fairly simple to recreate. However I am worried about the red eyebrow design if there is not a stencil or ribbon I can stick on involved. I will practice this look on Hayley constantly getting her feedback on how she wants the design executed. Although on me there was not much of a skin contrast I feel she has designed her look well to suit her own face, considering her skin tone and eye colour.


Creating Hayley's design on Hayley.

Creating the design on someone else is not as easy as it is creating it on yourself as you know your face better than anyone else. But the design suited Hayley's face a lot better than mine. I was concerned about the brow pattern. Luckily Hayley supplied me with a stencil which I used eyeshadow to on the stencil to create her look. This looked a lot more effective and precise than me freehandedly painting it onto her. After practicing on Hayley I now feel a lot more confident that  can create her design.

Thursday 14 November 2013

development of my final design.

Trialing some of my look ideas. I wanted to try out a bee-stung lip as I feel it would suit my design I am considering using. I decided to use red as it represents royalty and women would often have red stained lips. referring to James Shirley The fair falon poem. As well as the colour symbolism in the film Elizabeth Shekhar Kapur 1998.
I quite liked the look of the lips in a dark red however I am not sure whether I am going to do the lips with more of a brown toned red or even brown. As once I bring my design together I am going to have a lot of warm colours in my hair so I was thinking about keeping the face cool with blusher adding a pinch of colour to my face. I found the lips rather easy to do and not time consuming.


As the embroidery on the clothes instantly reminded me of henna patterns I decided I wanted to use an embroidered pattern somewhere on the face. I initially wanted it on the lower half as the hair is going to be strong so I want to keep the face clean and plain looking, whilst still using elements of Elizabethan makeup. I also wanted it here due to where Flora's flowers stop on her neck on Botticelli's Primavera painting.  I wanted to use Henna as it was a well known beauty method for dying the hair a shade of red.


Here are some images of the embroidered look I wanted to create. I created it using Henna stencils. I applied a matte brown eyeshadow on with a fluffy blending brush to make sure the pattern looked soft.
I like this look however I will need to supply sellotape as the stencil tended to slip so the patterns were slanting slightly.

Dramatic Elizabethan look.

Today we had the chance to recreate'copy some contemporary Elizabethan makeup. One was a gothic look and the other was quite dramatic and had golden tones to it. Both with extremely pale bases.

As I only had 10 minutes t create the look due to going second I felt it looked awful! The base was too thick, and the cheeks could of been blended much better. I was quite proud of how neatly I lined the lips considering I did them in one minute. I t does look very theatrical if I was to do this again obviously I would blend the base into the neck .

Wednesday 13 November 2013

Final face charts.

Here are my three final face charts that are all Elizabethan inspired. All three have been inspired by Elizabethan looks, colours,textures, and some of which have been inspired by some of the techniques learnt in class.

This look has been inspired by both of my previous face chart designs. Taking the simplicity from one and taking the Henna embroidery inspired design from another. The henna idea was also inspired by a painting by Renaissance artist Botticelli. As well as the fact that the Elizabethans would die their hair using henna I illustrate this by the henna neck design. In this design I would like to block out the brows or make them white Aqua paint. On the Eyes white eyeshadow,pale base,rosy pink cheeks("a white skin was essential feature perfect beauty" The artificial face,Fenja Gunn.) and a bee-stung lip. I am not sure whether do a brown toned lip. Henna going up the neck and jaw.

Product list.

 Primer:Illamasqua matte primer.
 Foundation:Illamasqua white base foundation. 
 Powder:Illamasqua translucent powder.
 Concealer: NC15 Mac studio sculpt.
Contour: Almond kryolan powder.
Blusher: Rosewood Kryolan.
Highlight: Highlight powder Kryolan.
Eye shadow:Krylon matte white.
Eyelashes:White painted false eyelashes.
Eyebrows:Aqua colour white.
Lips:concealer NC15 Mac studio fix.
Lip colour: Lady Danger Mac,Lc008 Kryolan lip palette.

 This look was inspired by the gold and jewels that the aristocracy used to wear. I also used warm colours on the eyes to represent the warmth of the hair. I want the skin to almost shimmer as I feel this adds a nice rich texture to the luxurious look I have designed.

Product list.

Primer: Mac Prep and prime neutralise.
Foundation Illamasqua white base foundation/Kryolan event foundation pearl.
Concealer:Mac Studio fix NC15.
Powder:Illamasqua translucent powder.
Blusher:Rosewd Kryolan.
Eye base:Event foundation Kryolan pearl.
Eye shadow:Cherrywood Kryolan/ matte white eyeshadow.
Eyeliner:Blacktrack Mac.
Mascara:Lancome Hypnose mascara.
Lip colour:LC004 Kryolan palette.
Illamasqua:Metallic Gold.
This look was inspired by the greens that were often displayed on dresses in portraits. I wanted to exaggerate the rosy cheeks by using the contouring and highlighting techniques learnt. I also used complementary colour with the red lips and dark green eyes. I used a metallic colour on the eyes for texture.

Product list.

Primer:Illamasqua Satin primer.
Foundation:Illamasqua white skin base foundation.
Concealer: MAC Studio fix NC15.
Powder: Illamasqua translucent powder.
Blusher/contour:Rosewood Kryolan.
Highlight:Highlight Kryolan.
Eyeshadow:MUA Smoky eye palette/Kryolan white matte eyeshadow.
Mascara:lancome Hypnose mascara Black.   
Eyebrows:MAC Spiked.
Lips:LC008 Kryolan lip palette.
Mac black track gel liner.

Monday 11 November 2013

Lip Trip.

When designing makeup for lips or eyes there are three general rules that you should follow known as the three c's.

  • Curve- The curve of the lips or eyes (the shape). 
  • Colour-Whether your model has a warm or cool skin tone.This can hep you decide what colours will compliment your model best.
  • Control-using certain lip liners and brushes will help you gain more control over the look.
To ensure you get the best outcome you must always prep the lips first using exfoliator. To exfoliate the lips you can use a muslin cloth, or if they are extremely dry use a exfoliator pad. To use the muslin cloth you must wet the cloth and massage into the lips with the exfoliator in a circular motion. The dab with a tissue dry and apply balm to help the lips hydrate.

The fuller lip.

To create a fuller lip that looks natural you must choose a lip liner 1 or 2 shades darker than the person's lip colour.


  • Tilt the models head at an angle this make sit easier for you to achieve a precise application.
  • Start at the outer corner of the mouth, using back and forward motion.
  • Take the pencil slightly above the lip line. Make sure you hold the pencil slanted using short,sharp strokes.
  • To do the bottom lip follow the natural line at first. Working for the inside of the lip to the outside.
  • Using a flat brush will make the lipstick application easier and more precise.
If you want to make the lips look even more dimensional then you can add a gloss on the cupid's bow and at the center of the bottom lip.
Link:www.fashiobelief.com
Viewed:11/11/13

Making lipsticks matte.

You can make any lipsticks matte by using a specific technique both using tissue.
  • Using a fine tissue to ensure the product goes through.
  • Hold the tissue up to the lips.
  • Dust the translucent powder through using a brush.
  • You can also use a brush to dab on powder.

Lip pinch.

This is an interesting look that creates a eye catching look without it looking too dramatic.
  • You will need a blank canvas to make the look stand out, apply white foundation tot he lips.
  • Using an eyeshadow cream or lipstick dab the product onto the cupids bow and center of the lips using a fluffy brush to blend.
  • To create an ombre effect use an opposing, monochromatic, or complementary colour and massage this colour into the lips using a fluffy brush.

Here is an image that Lara created today it is the lip pinch effect. I really like this look as its not too dramatic but is an interesting look.


Here is a page out of Kevyn Aucions `Making Faces` book. I thought I would include this page as it shows you and briefly explains alot of modern and period lip shapes you can create. The lip I think I would like on my final design is a Bee-stung lip. Although this is classed as being really 20's It reminds me of a heart more than anything and I could reference it to the Queen being the heart of England. I am not sure what colour I would like to apply it in or consistency I will experiment and blog!


 Today we got paired with our partners for our assessment. Which meant that we were able to share some draft ideas on the lips. As we are doing each others designs I decided to have a go at one of my partners potential ideas. The ombre lip using reds as the Elizabethans did.

Ombre lips.

I created the lips by lining the lips and filling in the corners to add more depth to where the darker colour would be applied. I then used Macs lip mix in red and white to create a light red which turned into a rose pink; I applied this to the center of the lips and t the inside of the lips. I then blended it out slightly with my fluffy blending brush. I then used Macs lip mix in black and red and applied this to the outer corners of the lips blending inwards. My partner decided that she wanted the center of the ombre ot be more rd than pink so I applied just red lip mix on top and blended. I then cleaned up the lips by using a light concealer.
For a first attempt at ombre lips on someone else I thought it looked quite good! However I think the colours could be richer however I am happy with how I lined the lips as I felt I had a little control over the shape and fullness. I felt the lips suited my partner and really complimented her cool skin tone.

Classical Elizabethan Makeup


To create a classical Elizabethan look of porcelain skin,light brows and lashes, flushed cheeks and lips using only Illamasqua products.

To begin with I added a Illamasqua's matte primer with their white skin base foundation, I mixed it into the back of my hand as this thins down the product making the foundation go on evenly. I applied the mix with my foundation brush  ,buffing it in with a big fluffy powder brush. Making sure the hairline, ears, jaw and neck were covered. I then used a disposable mascara wand with illamasqua's white foundation base in the brows. Brushing the brows in the opposite direction to make sure every hair was coloured white.I then brushed the white foundation on a mascara wand on the lashes at the roots to the end. I then powdered the skin using translucent powder;then applied a rather pink powder blusher which I just blotted on the apples of the cheeks as this is what we were told to do as they did not have much technique in the Elizabethan era. I patted the powder blush onto the lips.
Here was the outcome. I felt I could of applied the foundation higher into the hair line, and maybe used the blusher on the cheeks and lips more sparingly. Other than that I am pretty happy with the eyes as base as it looked smooth and even!

Sunday 10 November 2013

Lips and eyes (week 5)

Eyes and lips are often considered to be the main focal point of the face. Eye products are used to add definition,shape,contour and color to the eye area. Before applying makeup to the eye it is a wise choice to take a look at your model and decide what their eye shape is, and complexion to figure out what colour may suit them best.


Here is a basic eye shape chart that has characteristics to help you decide what defines what eye shape to help you with your application. 

After preparing the skin and applying a base the next step to take is creating the eye look desired.

Defining the eyes.

  • Make sure the eye area is well powdered to begin with as this will make the shadow sit better and blend better. If you are worried about fall out a useful step to take is to apply a fair amount of translucent powder under the eye to catch fall out you can then brush this away without leaving traces of shadow where you do don't want it, you could also use a tissue or powder puff under the eye.  Once you have decided what eye shape your model has, choose three colours that you think will compliment your model. Usually one light colour and two darker colours work best.
  • Using a flat brush apply the lightest color all over the eye up to the brow bone. Using your medium toned colour you picked apply the shadow on the lid using a fluffy shadow brush. Continue applying from the lashline to the crease. Then apply your deepest shade on the outer corner of the eye and blend as you apply it. The darkest colour will really help add definition to the eye. You can continue blending with your fingers this will make the eyes look more seamless. You  can also apply the two darker shes under the eyes blend for a soft effect.

Applying eyeliner.

  • You can also apply eyeliner to complete your look. Remember different eye shapes suit different liner applications. It is recommended to use Gel eye liner on the top of the lid as this is easy to blend and apply. Bobbi Brown gel eyeliner is recommended. I also like cake eyeliner as it helps you achieve a precise application that sets matte. Using a small amount of eyeliner apply it to an angled brush apply it to your top lash line.
  • For eyeliner it is best to start lining in the middle of the top lash line and move to the outside corner of the eye. You can gently lift the eye to get as close to the as possible.
  • Apply the liner in soft smooth strokes, not too big strokes as it is harder to take control.Apply the liner all the way to the inner corner of the eyes. 
  • You can also apply liner under the eyes or in the water line.

Defining eyebrows.

Defining the eyebrows is extremely important as it frames the face! 
"The start of the brow should follow an imaginary line drawn from the outside of the nse to the inside corner of the eye."(Bobbi Brown)

  • Start by combing through your models brows using either a brow brush or a clear gel this will also help to set your eyebrows into shape.
  • Choose a colour that matches their eyebrows and hair.
  • Apply powder shadow start at the inner corner of the brow,making sure you fill in all of the gaps in the brow hair.
  • Bring the brush to the center,creating a arch for the brow and then turn the brow brush and go downwards. Making sure the brow is long enough.

Applying mascara.

  • Make sure you start with clean eyelashes. Firstly curl the lashes to get the best result. Curl the lashes by placing them in the curler gently lift the eyelid,hold the curler in front pressing the curler for five to ten seconds.
  • Apply mascara using a disposable wand working the lashes from root to tip, making sure you apply the mascara close to the base of the lashes apply in a sweeping upwards motion. 
  • Adding two to three coats will make a impact.
  • Then apply mascara lightly to the lower lashes, you can turn the brush at an angle to get all of the lashes.
 Here is a defined eye look I created on a friend using purple.
I quite lie this look it reminds me of bridal or prom makeup however it complemented her almond eyes. I find contouring the socket line easier if I can feel the bone first!
 Where as I have hooded eyes so I have to apply shadow above my socket bone otherwise you cannot see it! I find that I have a rather high crease so applying shadow above the crease can  make it look even higher. I find that I have to use warmer lighter colors in my crease to make my eyes pop otherwise it can just look too much and make my eyes look tiny or droopy. I also apply shimmer to my lid and matte to my crease and brow bone I find this complements my eye shape and skin tone the most. I also like to use winged liner as I feel this lifts my eyes.


Lips.

Firstly you must prepare the lips this is essential for a perfect outcome! Before a shoot it is ideal to ask your model to exfoliate the lips to make sure the lips are smooth as a baby's bottom! They can exfoliate using a lip exfoliator or even a dry tooth brush. Then ask them to sleep with a balm on to make the lips moist for the shoot.

  • Firstly apply a lip balm on like carmex or a personal favorite Urban Decay Lube in a tube is amazing! You can put this on whilst applying eyes or a base.
  • Then choose a colour that will compliment the eyes; "fill in the mouth with a neutral lip colour" (Kevyn Aucoin pg30 Making faces.) Kevyn mentions this is he book whilst speaking about smokey eyes. Using a lip brush apply the product evenly over the lips making sure to fill in the corners and lip line. 
  • Use an angle brush for precise application it can also create a precise cupids bow look.
  • You can apply gloss if this is the desired look, this will help make the lips look plumper. However if you want the lips atte you can leave them be or blot  them with a 2ply tissue if its a shiny lipstick. 

Wednesday 6 November 2013

Developing my design

 For my first Elizabethan face chart I was inspired  by Elizabethan embroidery. The swirls and flowers. So I decided to incorporate this into my  forthcoming design.


Link:www.anne-boleyn.com
Viewed:6.11.13

 From this image I liked the design in the background.

The Elizabethan patterns remind me of Henna. I think I could try and incorporate Henna tattoos into my design. 


Link:www.jmddesigns.co.nz
Viewed:06.11.13
I also liked the design in this image. This is a image of Elizabethan embroidery. I liked the swirls,leafs and flowers. I found the birds on the design to be specifically interesting. I quite like the colours and the bead texture.


My main inspiration behind this look was from Botticelli's Primavera painting. There is a goddess called Flora in it represents spring, there are several images of her. One with flowers coming out of her mouth and one where the flowers go up her dress and stop at the neck.


This was my first face chart. I would like the skin to be pale and matte. I would like an Almond brown eye and light brows. Rosy pink cheeks. On the lips I have tried to draw a Elizabethan pattern with the swirls coming from the corners of the lip. I found this hard to draw and easier to demonstrate my idea on myself.
 On the lip I wanted to try and make it look like doll lips but with swirls and lines. I then used black aqua paint to create swirls and a flower.
I then decided that I did not like the bottom half of the lip and took it off. I then extended the design onto my jaw and neck which I quite liked adding leaves into the design like the embroidery image. 


I then decided to add colours. I used blues, greens, red and gold. As these colours were on the embroidery and work well together. However I am not keen on the design I think it looks too messy. I do like the idea of having a design on the lip I will buy stencils and possibly henna stick on tattoos that remind me of the patterns on Elizabethan embroidery.


My second face chart I constructed was inspired by an Elizabethan poet James Shirley the poem that inspired me was `The Fair Falon`. The words that influenced this face chart were

 "Playing the eagle; her clear brow, and the virgin red lips. The film Elizabeth Shekhar Kapur 1998. With his use of colour and symbolism red resembled power, and blood.


Is a comely field of snow.
A sparkling eye, so pure a gray
As when it shines it needs no day.
Ivory dwelleth on her nose;
Lilies, married to the rose,
Have made her cheek the nuptial bed;
Her lips betray their virgin red,
As they only blushed for this,"(James Shirley 1633 The Fair Falon)


As you can see I have covered the brows in white I have added winged white eyeliner with white eyelashes. The cheeks are rosy, and the lips "virgin red". I also stuck a bit of a paper lash on the lip it looks like a flower to me. I would like the skin fair for this design. This design to me seems simple and pretty but I think it would work well and would like to try both.


I created this look firstly by prepping the skin making sure all makeup was off throughly as I wanted the look to look as fresh as possible.

I then applied stargazers foundation in the colour white and mixed it on the back of my hand using Illamasqua's matte primer. I then applied Macs studio fix concealer on any blemishes (NC15).  I powdered the base well using Illamasqua's translucent powder to set the skin. I then added a pinch of colour to my base using Kryolan blusher in rose wood I applied blusher on my cheekbone to the apples making sure it was blended in well.


I then applied Supra palette grease paint in the colour white on my eyebrows and lashes with a disposable mascara wand.  I wanted a white winged liner so I used Aqua paint using a thin paint brush I created a winged liner effect.


I used a blood red glossy effect lipstick on lips to also capture the Elizabethan essence.

I quite like this look as it is simple however there are elements i would like to add to the look! Possibly making my own eyelashes. I did not like the winged liner with aqua paint as I feel it looks to clumpy and messy it also creases quickly! Overall I like the simplicty but I feel I could make it look more modern. Further experiments I will blog!


Tuesday 5 November 2013

Botticelli Primavera.

Botticelli-primavera.jpg
Artist:Sandro Botticelli.
year:1482.
Location:Ufizzi Gallery,florence.
The Primavera painting is said to be "one of the most popular paintings in Western art."(culture&values 2009). It has left many scholars and critics baffled. They do not have any history of the intended meaning or the story that this work of art is communicating creating a string of philosophies for the this thought-provoking image.

Looking at this image I can see possibly signs of love,fertility,and fate. I Can see this from cupid who is a symbol of love and fate. Fertility from Flora being pregnant and Venus. The three women who look to me as if they are dancing they look pure and innocent wearing white with pearls in their hair which symbolised purity.Possibly celebrating youth and beauty?Spring is often celebrated as it is the time that crops,fruit and beautiful plants grow, and of course beautiful weather. The man picking fruit from the tree could this be symbolic of the forbidden fruit? However as lovely as the image looks there is something very questionable about this image and the message it is sending to the receiver. The ghostly looking I am guessing God, or angel as he has wings grasping Chloris in a aggressive manner judging by his face. He almost looks like the wind to me could he be trying to ruin or postpone spring? It could be representing

This is one of the famous tales of the image (book of Ovdis Fasti) Ovid's Fasti in which the wood nymph Chloris's naked charms attracted the first wind of Spring, Zephyr. Zephyr pursued her and as she was ravished, flowers sprang from her mouth and she became transformed into Flora, goddess of flowers. 
This was the part of the tale that interested me. As the character I am I find influential is Flora. As the patterns on her dress have been part of my inspiration for Henna on my design. I like that there are flowers around her neck influencing my decision to have Henna on the neck. To me representing growth, multiple ways. Growth as in growth of flowers,fruit and crops, growth of a child and growth in beauty. 

Since this painting Flora has become an iconic character representing fertility and spring "Across the early modern period, the genealogy of Flora as fertility Goddess Ovidian "mother of flowers".(Figuring it out:Science,Gender,and visual culture. by Ann B. Shteir, Bernard V. Lightman,pg10). 
She has been painted again and again from people's minds. A popular painting is Rembrandt Flora. What I found interesting about his image was how her image has developed since Botticellis painting she looks younger to me. It is also interesting to see the fashion development clothing, makeup and hair flowers.  The Henna I will use will be my take on her symbolism for growth.
Rembrandt Flora (1634)
The state heritage museum,
St Petersburg.


Monday 4 November 2013

The New Elizabethans.


Edward Bond ‘The Third Crisis: Drama and Civilization ’
“The first Elizabethan age ended with the discovery of brave new worlds (and incidentally the joining up of the United Kingdom). We are certainly on the edge of vast new unprecedented worlds, cosmic changes in culture, economy and society (and ironically the possible dissolution of the United Kingdom). But are our new worlds brave, cowardly, explorative or degenerative? It could be said the old Elizabethans plundered the new worlds. Perhaps now we can only plunder ourselves and call it trade."

The Elizabethan era has had a huge impact on society,pop culture,sub cultures,high culture the list is never ending. Whether in fashion, makeup,hair,design, and strong minded people who are successful. Some influential like Elizabeth, Shakespeare and many others. As even today pupils are still having to study Shakespeare many have been influenced by his words.

Below is a handpicked list of people who I believe have influenced others and have changed some of our lives in the way of technology and the way in which we think. They may not be the most influential people in the world but to me I believe they are influential to many minds and have encouraged minorities or majorities to pursue their passions.


Lord Alan Sugar.

Link:www.goonerhead.com
Viewed:5.11.13
I have picked him because he is extremely successful and holds the `rags to riches` story that a lot of us may admire. I am not saying he is the first business man in the public eye to do so but he is one of the most popular of our era. He has made business become a part of pop culture with his TV show the apprentice. Possibly inspired many hopeful entrepreneurs that do not come from much affluence and do not know people within the industry to get them started. He is loveable to an extent as he appears to be typically British using the phrase `bloody` alot. He does not seem to be snobby, he appears to me to be rather down to earth. He brings a lot of revenue into our country, and gives alot of people once in a life time opportunities. Plus gives the other contenders exposure to other businesses.

Bill Gates.

Link:www.cnmeonline.com
Viewed:5.11.13
He is the brain behind Microsoft one of the most renowned brands in the world! If it was not for him we would not have all of these amazing programmes in our day to day lives that make our lives soo much easier!On a personal level, modern technology allows us to stay in touch with friends and relatives instantaneously at any hour of the day in any location. Modern communication has reshaped everyone's experience of the world and the information in it. He is also a very charitable person and has donated billions to third world countries. Most of us use his inventions everyday he has made writing essays,creating presentations so much easier.

Adele.

link:www.hdwallpapers3d.com
viewed:5.11.13
To me Adele is influential as she is extremely talented, successful  and what I like the most is she appears to be very humble. I believe she is influential because she goes against society's vanity. She sells her music purely with her simple, powerful voice. She can bring a room to silence with just her voice and not her body. I like the fact that she has not altered her image much to suit society, I am not saying she is unattractive I think she is classically pretty; but she does not conform to pop cultures group of exhibitonists. 

Mark Zuckerberg.

To me is influential as he has changed the way a lot of generations communicate. Not only people my age have Facebook but even my Nan does which surely can prove he has appealed to a large audience  Facebook helps us find people who's names we can't remember  Family, friends. It helps us stay up to date with brands, its beneficial to companies. Helps revenue and can sometimes open up opportunities  I.e if you get scouted for something.I believe it was created for positive reasons however many negative outcomes have come from this site. Broken relationships, cyber bullying. It can help some escape from reality but can also help someone create a false persona or even prey on others. So I see the negative effects. But I believe that Facebook will stay for a long time and can and to some extent has changed the way we communicate.

Paperself lashes.

During Laras workshop today we had the opportunity to trial paperself lashes. Some of the lashes looked as though they could of been inspired by Elizabethan designs such as embroidery on clothing. These eyelashes could be used to create a contemporary Elizabethan look. Lara also taught us how to pigmentate the eyelashes.

Paperself eyelashes.

Paperself lashes are a British based brand (London). Founded in London 2009 Their eyelashes are made purely out of paper and each have unique designs. Which is what makes them so successful and worn worldwide.
The eyelashes have been worn by various celebrities, and have been used on TV shows. 

The eyelashes can be used in various ways to create a solitary look. The lashes can be used as strip eyelashes. Or you can cut them up into shapes and use them on the brows,lips,nails anywhere your creativity takes you!


Today I had the chance to choose one of my Elizabethan face charts and create on a face. The face chart I chose was my monochromatic look.


I prepped the face, and applied a light coating of satin finish primer. I then applied a light amount of foundation buffing it into the skin. I applied concealer on any blemishes and powdered, to set the base.

 I contoured the cheeks using a deep plum blusher. I then applied a light plum blusher on the cheekbones and added a powder highlight on top of the cheek bone. This created a sharp angle which I thought would work well with the eye I wanted to create.

I applied a matte white eyeshadow onto the eye. I then applied a medium purple on the lid. I then used a deeper purple on the crease making the eyeshadow go to a point , as I wanted the look to look sharp and strong. I added a pearl shimmer highlight on top of the contour.
I then cut the lashes in half using half on top, the other half on the bottom. I felt this did not compliment the lashes at all I think in my rush I may of used the left lash on the the right eye oops!

I added a quick gold pigmentation in the brows.


 Here I did not get to finish my final look! I wanted dark plum lips and a stronger brow. I did not like this look! I felt it was not strong enough! I needed to use a darker purple.
I liked the paperself lashes or though they were a little harder to apply compared to normal eyelashes. Although
they do create an interesting look.


Pigmentation of the eyelashes.

Pigmentation of the eyelashes creates a eye-catching look that would work well with the Elizabethan theme as they often had bleached out looking lashes we could put a modern twist on it by emphasizing using colours on the lashes.

Firstly choose your colour or texture, then using a mixing medium mix the colour on the back of your hand or palette to make a cream lie consistency.

Then apply the pigment using a flat brush at the root of the lashes to make sure all of the lash is covered. Then using a disposable wand sweep the colour from root to to tip. You Could even add a powder pigment on top of the lashes such as a glittered on this would create a great look.