
Here is a basic eye shape chart that has characteristics to help you decide what defines what eye shape to help you with your application.
After preparing the skin and applying a base the next step to take is creating the eye look desired.
Defining the eyes.
- Make sure the eye area is well powdered to begin with as this will make the shadow sit better and blend better. If you are worried about fall out a useful step to take is to apply a fair amount of translucent powder under the eye to catch fall out you can then brush this away without leaving traces of shadow where you do don't want it, you could also use a tissue or powder puff under the eye. Once you have decided what eye shape your model has, choose three colours that you think will compliment your model. Usually one light colour and two darker colours work best.
- Using a flat brush apply the lightest color all over the eye up to the brow bone. Using your medium toned colour you picked apply the shadow on the lid using a fluffy shadow brush. Continue applying from the lashline to the crease. Then apply your deepest shade on the outer corner of the eye and blend as you apply it. The darkest colour will really help add definition to the eye. You can continue blending with your fingers this will make the eyes look more seamless. You can also apply the two darker shes under the eyes blend for a soft effect.
Applying eyeliner.
- You can also apply eyeliner to complete your look. Remember different eye shapes suit different liner applications. It is recommended to use Gel eye liner on the top of the lid as this is easy to blend and apply. Bobbi Brown gel eyeliner is recommended. I also like cake eyeliner as it helps you achieve a precise application that sets matte. Using a small amount of eyeliner apply it to an angled brush apply it to your top lash line.
- For eyeliner it is best to start lining in the middle of the top lash line and move to the outside corner of the eye. You can gently lift the eye to get as close to the as possible.
- Apply the liner in soft smooth strokes, not too big strokes as it is harder to take control.Apply the liner all the way to the inner corner of the eyes.
- You can also apply liner under the eyes or in the water line.
Defining eyebrows.
Defining the eyebrows is extremely important as it frames the face!
"The start of the brow should follow an imaginary line drawn from the outside of the nse to the inside corner of the eye."(Bobbi Brown)
- Start by combing through your models brows using either a brow brush or a clear gel this will also help to set your eyebrows into shape.
- Choose a colour that matches their eyebrows and hair.
- Apply powder shadow start at the inner corner of the brow,making sure you fill in all of the gaps in the brow hair.
- Bring the brush to the center,creating a arch for the brow and then turn the brow brush and go downwards. Making sure the brow is long enough.
Applying mascara.
- Make sure you start with clean eyelashes. Firstly curl the lashes to get the best result. Curl the lashes by placing them in the curler gently lift the eyelid,hold the curler in front pressing the curler for five to ten seconds.
- Apply mascara using a disposable wand working the lashes from root to tip, making sure you apply the mascara close to the base of the lashes apply in a sweeping upwards motion.
- Adding two to three coats will make a impact.
- Then apply mascara lightly to the lower lashes, you can turn the brush at an angle to get all of the lashes.
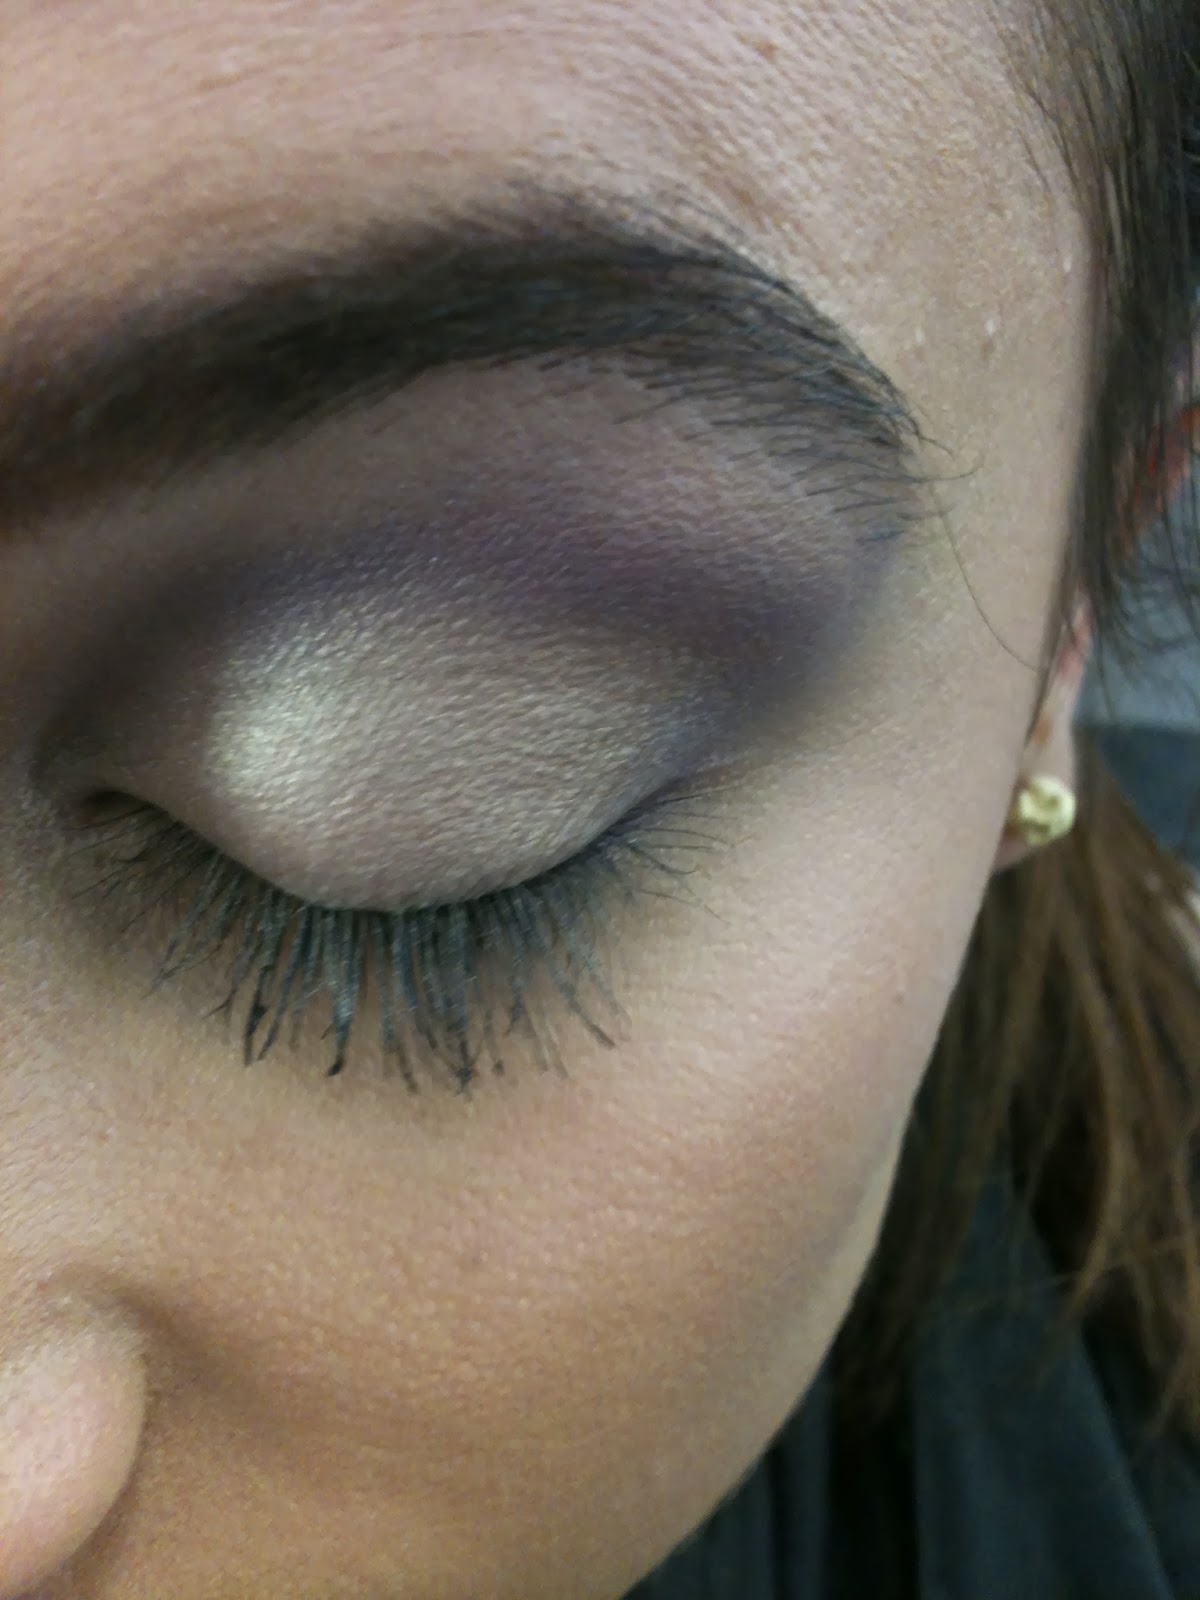
I quite lie this look it reminds me of bridal or prom makeup however it complemented her almond eyes. I find contouring the socket line easier if I can feel the bone first!


Lips.
Firstly you must prepare the lips this is essential for a perfect outcome! Before a shoot it is ideal to ask your model to exfoliate the lips to make sure the lips are smooth as a baby's bottom! They can exfoliate using a lip exfoliator or even a dry tooth brush. Then ask them to sleep with a balm on to make the lips moist for the shoot.
- Firstly apply a lip balm on like carmex or a personal favorite Urban Decay Lube in a tube is amazing! You can put this on whilst applying eyes or a base.
- Then choose a colour that will compliment the eyes; "fill in the mouth with a neutral lip colour" (Kevyn Aucoin pg30 Making faces.) Kevyn mentions this is he book whilst speaking about smokey eyes. Using a lip brush apply the product evenly over the lips making sure to fill in the corners and lip line.
- Use an angle brush for precise application it can also create a precise cupids bow look.
- You can apply gloss if this is the desired look, this will help make the lips look plumper. However if you want the lips atte you can leave them be or blot them with a 2ply tissue if its a shiny lipstick.
No comments:
Post a Comment